The challenge of making a crazy quilt is the lack of a pattern, which makes you rely upon your own sense of design to lay out the fabric pieces. A good way to meet this challenge is to think like a painter. The muslin base is the canvas. The collaged fabrics are the first color and the embroidery and embellishments are the ongoing layers, which add depth and texture.

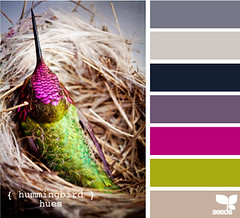
The hardest decision is in choosing your colors and materials. Remember to always use complementary ccolors in a selected tone of pastels, dusties, or jewel tones. Strive for a pleasing mix of textures, patterns, and solids. As you sew make sure the pieces complement each other in color and fabric type. Above all, remember to never put pattern against pattern to make sure your beautiful embroidery stitches will show up! Always bounce a solid fabric against a patterned fabric.
Quilt
For a crazy quilt, large or small, you should work on a square or rectangle of muslin or plain fabric. Working 12" or smaller is recommended so that the piecing is easier to handle.
First decide on the finished foundation (muslin) size for each block and cut the muslin one half inch larger than the desired finished block size. This allows for any puckering or tight tension variations that could draw up the size. You can always cut the finished piece down to the proper size later. Also remember that the finished block size in this case is the unfinished block size for your quilt. You will have to have a seam allowance to sew your blocks together into a quilt. A half inch should provide this necessary allowance.
Here is a basic Crazy Quilt pattern you can use to try your hand at crazy quilting. Just remember that you can do this many different ways, and that this is only meant as a suggestion.
Cut the number of 12 and a half inch muslin squares you will need for your finished project. You could cut one if you just wanted to make a single block for learning purposes.
For each block you want to make also cut a five-sided piece of solid fabric. Make the sides angular, not parallel. Don't make it too big or too small roughly about a ninth of the block (like a tic tac toe pattern on the muslin foundation square). It will serve as your crazy, off center middle of your design.
Also cut 2 to 3 inch wide strips and then cut them into rectangles of varying length.
Start Making Your Crazy Quilt Block
Place a five sided center piece close to, but off center of your muslin square. Make sure none of the sides line up parallel to your muslin square's sides. You want this a bit funky. Make sure this is right side up (as in the right side of the fabric.
Now place a patterned fabric rectangle on top of the longest side of the five-sided piece, aligning the edges with the longest side and right sides facing. Stitch a quarter inch from the aligned edges through all 3 fabrics.
Right-handed quilters will be more comfortable working clockwise around the center piece and left-handers working counter clockwise.
Now use a steam iron to turn and press the rectangle over the seam allowance, pressing away from the center piece. Trim the seam allowance close to the stitching line to remove the bulk in your design.
With right sides facing each other, place another rectangle, this time a solid one, over the first rectangle and edges even with side 2 of the center piece. Always cover the previous piece (in this case the first rectangle). Sew from the edge of the previous rectangle to the edge of side 2.
Turn and press this rectangle over the seam allowance, again pressing away from the center piece. Trim the seam allowance close to the stitching line.
Continue sewing additional fabric rectangles to sides 3, 4 and 5 of the center piece. Note that new angles can be created as you go, and excess length can be cut off. Trim any rectangles that extend beyond the foundation fabric even with the edge of the foundation fabric.
The rectangle that will cover side five will be long, as it must extend beyond the fabrics on both angles 1 and 4. To add interest and create a more collaged look, consider the following options: Pieced rectangles, pieced and curved shapes, and pieced fans.
Now that you have completed the first go-around and shapes have been sewn to all five sides of the center piece, it is necessary to cut more angles from the pieces you have sewn down. Be brutal in cutting back, cutting from seam edge to seam edge, trying to achieve at least five more angles. Work toward a variety of shapes and sizes.
Be sure and press each piece over the seam allowance as you go and to use rectangular pieces and cut back for more shapes and sizes after each go-around. Also remember solids then patterned pieces.
After the foundation piece has been completely filled with fabric strips, trim the block to the desired size. Press the block on both the front and back. Don't leave any loose pieces.
You can add embellishments of ribbons, trims, and laces, stitching them from edge to edge of the foundation piece so that the ends will be included in the seam allowances. It is best not to attach these embellishments parallel and too close to the edges of the block as these spaces will be covered with embroidery stitches.
Sew your completed blocks together. You can add embroidery stitches over the seam lines joining the blocks. Some suggested embroidery stitches include the French Knot, Lazy Daisy, Blanket Stitch, Herringbone Stitch, Chain Stitch, and the Feather Stitch.
Sew in any borders between blocks and finish your quilt top.
How to Make a Crazy Quilt Block by Block
ไม่มีความคิดเห็น:
แสดงความคิดเห็น